|
Seconde case : Real Time with sound card
In this mode, you will be able to do everything without your recorder, it is PowerDyn which will carry out the acquisition of the signal for you.
First off it will be necessary for you to regulate the volume of acquisition. You will be able to exploit the parametres such as sound volume of recording of your sound card and the value of the tension divider bridge on the outlet side of the clip. The maximum tension not to exceed on the entries of sound cards its 1V. If you use the AutoDiag kit for sound cards, you will not have anything to touch from an assembly point of view, the audio exit already being calibrated correctly.
Carry out all connections, wether you are using the AutoDiag kit or a clip on the wire of a spark plug. Connect the jack on the entry line in or Microphone of your laptop.
Before you will needto configure a vehicle, the choose the option real time sound card in the selection box before clicking on the icon Torque and Power.
Once the noise level is set, you can check that the engine speed is well interpreted by simply clicking on the green key play. If your engine is started and that the connections are correct, the engine speed should appear in real time. You can stop the aquisition by clicking on the cross.
Once the noise level is set, you can check that the engine speed is well interpreted simply by clicking on the play (green) key. If your engine is started and the connections are correct, the engine speed should appear in real time. You can stop posting by clicking on the cross.
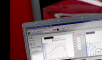
Click here for a screenshot 
You are ready to make a measurement. Choose the gear/ratio on which you will carry out the measurement, set the threshold of detection (leave it by default for the first measurement). If you wish to bring back your measurement of power in the CNTP (normal conditions of temperature and pressure), use SAE correction. This will allow you to compare two measurements carried out under different weather conditions. If you tick use threshold departure, you will be able to choose the starting rpm from which acquisition will start automatically as soon as you have clicked on the iconPlay green. Choose the duration of the recording. 5s corresponds to an acceleration in first gear, 10 or 15s for an acceleration in second gear, 20s for a test in third gear. Even if the acceleration does not last as long as the time you have selected, it doesnt matter, PowerDyn will automatically detect the end of your acceleration during the analysis.
Drive a few kilometres to heat up your engine as as well as the tyres (the coefficient of friction decreases with the temperature of the tyres). The measuring accuracy depends on the conditions under which you will carry it out. The ideal is to use a very flat road, on a day without rain or wind. If you think that the road is slightly sloping, you will have the possibility of carrying out a test in each direction and making an average with the two results. The ideal is also to make measurements on the same road, by staring in the same place.
When you are ready, if you are using the release with a starting threshold, click on the Start recording icon and start to drive on the gear/ratio chosen without exceeding the release rpm level. As soon as you want, will accelerate flat out, the recording will start. At the end of your acceleration, continue to drive normally while passing the supperior gear/ratio, PowerDyn will draw your curve after the selected time is over.
If you do not use the threshold of release, acquisition will begin as soon as you click on the start recordingicon.
If you obtain an error message, it is because the quality of the signal was not sufficient. You have the possibility of adjusting the threshold of detection and to Retrace the Interpretation test without having to make new measurement to try and obtain your curve.
Carry out the smoothing of the graph if you wish to, but do not exceed level 4 under penalty of drawing you aside from reality. Finally click on the diskette to save your measurements and to associate them to the vehicle in progress.
Summary :
- The icon in the toolbar "Play" allows u to see the rpm counter
- The cross allows you to stop the rpm counter
- The diskette allows you to save the Torque/Power data on the selected vehicle (Marqued in the title toolbar). Careful all previous trials will be erased.
- The diskette with a blue arrow, enables you to save your acquisition under WAV format. This option is useful to check your acquisition in a third party program (like GoldWave), to treat your signal with advanced options.
- The printer allows you to print the content of the screen (in landscape mode)
Click here to see the interactive demo 
Previous - Next
|